Here’s a reminder of what my yard looked like when I moved it at the end of June last year:


Although summer had JUST begun, the lawn was mostly brown, covered with pine cones and LOTS of weeds. The entire area is duplex rentals, and renters typically don’t invest much effort or money into enhancing the landscape.
 There is a landscape service that mows and edges the lawn; but that is ALL they do. Most of the tenants don’t even bother to water their lawns; even though water is included (up to a certain limit!).
 The ‘rule’ for tenants as far as adding any landscaping is that we can plant in the ‘dirt areas’ only. The unit I moved into just happened to have MORE dirt area than any other unit; and there are over 100 units! (lucky me!) There were a few plants (shown above) in the large front area when I moved in; but not knowing WHAT they were, I decided to just pull them in order to have a ‘blank slate’ to start with.
 The ‘front’ dirt area wraps around the entire right side; but I decided initially to just tackle the ‘front’. I kept waiting for some ‘cooler’ weather to start planting, since I was getting a late start to begin with. It never cooled down so I forged ahead and bought gallon perennials that would be less perceptible to dying from the heat.


Since I did have a completely blank slate to start with, I even went to the expense and TROUBLE (more trouble than expense!) of tacking down that black fabric ‘weed barrier’ stuff.
HELPFUL GARDENING HINT: Don’t bother with that weed block stuff!! It does NOT help at all. In fact, the weeds grow right THROUGH it just as easily, BUT the roots of those weeds ATTACH themselves TO that black mesh and are IMPOSSIBLE to pull out through it! Believe me, I TRIED!
So before planting any more flowers this spring, I tried to pull all the weeds first. In doing so, the weed was SO well attached to the mesh, that it actually pulled up the mesh right with it! Enough of that, I said! I grabbed my razor knife and cut the mesh into sections and pulled it up, weeds and all!! Now I’m trying to get in the habit of weeding a little every week. If I catch them early enough they will come up with a few swipes of a hand weeding tool.
 This is as ‘good as it got’ in my front flower garden last summer. I really wasn’t expecting much though; considering I got such a late start. I just looked at it as a ‘head start’ on this years planting! It’s not very visible in the above photo, but I found a little white wire fence section at a garage sale, that I put in to border my flower bed. It was not long enough though, and I never did find any more matching fencing to add to it, so I pulled that this year.


I did get a few nice blooms towards the end of last summer.
 This container on my porch got nice and FULL last summer!


Early this spring I desperately needed ‘some’ color in my garden; and bought a few forced bulbs (tulips, crocus and narcissus) to plant along the edge of my porch. Again, this was more ‘thinking ahead’ to next year; because these were already in bloom, they faded quickly this year. (this picture was BEFORE I had pulled up the dreaded black weed blocker; which you can see in the photos. shudder!)
 We had a string of GORGEOUS, early spring, sunny and warm days in late May – early April and I was itchin’ to get my hands in the dirt again! (this is AFTER pulling up the old weed barrier) I added about 20 bags of steer manure ( broken down into 4 separate shopping trips; spread out over 2 weeks for the sake of my bad back!)
I’ll share with you how I managed to unload, haul and spread all those BIG HEAVY bags of manure with my bad back; just in case any of you also have similar back issues and limitations.
Getting them loaded into my car at the garden center is no problem, as I just ask for help and tell them I need them to load onto the cart AND into my car as I have a bad back and cannot lift them. I specifically have them load all the bags as close to the back edge of my car as possible; (PT Cruiser; so it’s a HATCH and not a ‘trunk’. This method wouldn’t work in a typical trunk) as shown in the above picture. When I got home, I pulled out my little ‘flat bed dolly’ and just rolled the bags out of the back of my car and onto the dolly; letting gravity do the heavy lifting. (I got my dolly years ago at Costco. It is specifically sized to carry the plastic storage bins; but can be used for anything, really) I use this baby for EVERYTHING!!

Getting the bags to their final destination: I have an old folding ‘luggage wheely’ cart that I put next to the stack of bags on the dolly, and ‘roll and plop’ one bag onto the luggage cart. Then I can just pull that across the yard to where I need it and roll it off and onto the ground.

Once the bag is where I need it to be, and while it is laying flat on the ground, I slit it open from end to end and side to side. Then flip it over and pull up each corner of the bag to empty the contents. Toss out the empty bag and spread the manure out with a garden rake.
In the areas where I already had existing plants and could NOT just dump the whole bag out: I still slit the bag open; end to end and side to side and loosened it up if needed) with my weeder tool. Then using my trowel, I scooped and filled a gallon container and hand poured that around the plants. Then filled in the surrounding bare areas the same way. It SOUNDS like a very long and drawn out process, but really it only took about 5 minutes or do to empty out each bag. When the stack of bags is fairly high, I sit on my little garden trolley while I am scooping into the container, so I don’t have to bend over and hurt my back. When I get down to just ONE bag, which is lower than the trolley, I kneel on my foam pad ‘knee protector’ while I scoop.

A ‘word’ about those foam pads . . . . . they wear down QUICKLY! Whether you buy a twenty dollar one from a pricey garden center, or get one from the dollar store; If you really USE it a lot (like I do!) they will be totally useless before gardening season ends. My solution this year? I bought THREE of them and a spool of duct tape at Dollar Tree. Taped the three of them together into one big fat knee pad! It’s perfect!!! AND not being quite as low to the ground makes getting back up easier on my back! Win – WIN!!

And FINALLY I’m ready to start planting! This load was a few herbs for the ‘back garden’ and some more perennials to fill in the front area. My ‘vision’ is to have the whole front area COMPLETELY FULL of flowers.

This is what it looks like right now. I was HOPING to do more ‘seed planting’ this year since I’ve got an earlier start . . . and to minimize the expense of buying potted plants. The neighborhood squirrel population put the kibosh on that plan though! Those critters LOVE to dig up and bury peanuts in MY garden because my soil is nice and soft! (and several other neighbors have bird and squirrel feeders!)
Between the squirrels digging up all the seeds and the birds eating them. . . it would have been totally futile!

So I devised some make shift mini greenhouses to start my seeds in.
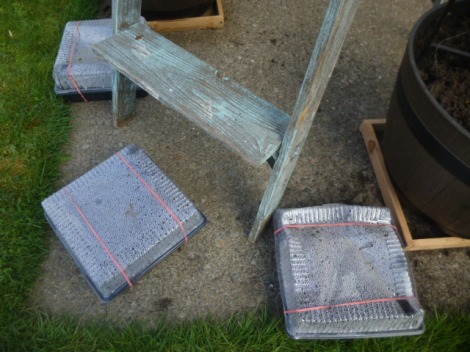
And used these little starter kits I found at the thrift store. Once they are big enough to transplant into the ground, they should be big enough to ‘survive overnight’ if dug up by the squirrels. I seriously have to ‘check’ all the newly planted plants EVER DAY . . . and re-plant a few that have been dug up every day!


While the ground was still soft and moist for all the spring rains, I put in a cute little white picket border (which I bought at Dollar Tree!) in the front and wrapping around the side. It was a pretty time consuming project and each little section had to be put in ‘one by one’.


The sections are supposed to interlock, end to end; but I had to lock them together before sticking them in the ground and they kept coming apart when I put them in the ground!?!?! My solution? ZIP TIES!! I just used zip ties to attach them together after I put them in the ground.


I honestly do not even remember what all I have planted!! I just did random plants (what was on sale at the time!) in random order for the most part. Except under the window; where I planted three hydrangea. Which will hopefully, eventually make a nice ‘hedge’ under the window; and a nice backdrop for the rest of the flowers.


The side of the house had been VERY problematic!! Initially I envisioned this being filled with rose bushes, as it gets a lot of sun. However, there are cables that run right down the middle of this 14″ deep border; from the utility boxes to the back edge. AND there are big ole tree roots about 2″ down on the side closer to the front?!?!
I planted some mums along the back and some winter pansies towards the lawn edge last fall. They did not do well. Half the pansies were dug up AND carried off by the squirrels; and the mums turned dormant REALLY quickly. Most of them are starting to sprout again, so I’m in ‘wait and see’ mode for now. I added some gladioli bulbs about a month ago, between the mums. But I guess I’ll just make this my ‘cutting garden’ for planting annuals; since the tree roots and cables don’t leave much room for roots.

Freddy’s had little starter 4-paks of assorted color Lobelia on sale for 79 cents this week; so I splurged and bought TEN 4-paks!! The plants are so small that they are barely visible now that I have them all planted; even with so many of them. I planted them around the border of the front garden and placed a few in bare spots, here and there.


The ‘back’ garden area is conjoined with the neighbors. (In the front, our garages are in the middle and separate our front yards.) She has given me permission to plant ‘whatever I want’; which is nice because it would look really strange to have one side filled with green and the other still dirt. I put a few concrete stepping-stones in the middle where the water faucet is; then plan to plant each side the same.

In the center of the back garden area, and just under the bedroom window; I planted a Japanese holly and four Delphiniums, two in front of each little trellis. (got these little wire trellises at Dollar Tree too!) The hope is that they will grow tall enough to provide some shade. This back side gets the hottest sun of the day all summer long.


In front of those, I’ve planted 30 ‘ever bearing’ strawberry plants. Ordered them via the mail, as bare root starts. We probably won’t get a lot of berries this year, but they will grow back year after year, so it’s an ‘investment’.

I bought a few herb starts; that I planted close to my patio.

And I have NO IDEA what to plant in the rest of the area . . . yet! Thinking marigolds along the front border (hoping the ones I started from seed actually GROW!)


And for shading the back patio door (which leads to my bedroom and was unBEARably HOT last summer!) I got two big plastic 1/2 barrel pots, 6′ metal trellises and gallon pots of Jasmine; which should vine up nicely and generate some shade. And I’ll fill the ladder with planters filled with petunias. I envision them flowing over the edges and completely covering the ladder, eventually.
BARGAIN GARDENING TIP: Sometime every spring, and for a far back as I can remember, (and usually the week before Mother’s day!) Freddy’s has ‘tray packs’ of petunias on sale for $9.99. They are not planted in individual little pots, so you have to separate the roots yourself, but for that price; who cares!?! There are usually at least 20 plants per tray. (my son used to buy me one of these every year for Mother’s Day!) I think they might also have marigolds for the same price. (I know there were two options, but I always wanted Petunias, so I’m not certain what the other offering was!?)
I’m waiting for those petunias to go on sale this year to fill the planters that I will put on the ladder rungs. These rungs have been made deeper with an added piece of cedar fencing on them, to better hold the planters. I’ll probably buy a few individual ‘wave petunias’ for the planters on the upper rungs so they will trail over.

Another great ‘bargain gardening tip’ is to take advantage of Freddy’s “Fuchsia Saturday” special. It’s already come and gone for this year (April 9th), but watch, and PLAN for it for next year. They do it ‘rain or shine’ too. This was my first time taking advantage of it; and the weather was perfect! The guy planting my baskets was telling me that it HAILED last year for the event. (in which case they set it op under cover in the garden center.)

There is a limit of 8 planters; maximum circumference of 18″. The Fuchsia starts were on sale 5 for $3.00. I got my hanging baskets and coco mat liners (individually priced) at Dollar Tree. You have to go inside the garden center and purchase your starts FIRST; then get in line for the planting station. I bought 3 starts for each basket; they provided the soil. I took home 7 hanging fuchsia baskets for less than $5.00 each!! Of course it will be a while before I get blooms on them . . . .but for that price, I can wait!
I have them hanging over my front porch where they get a bit of morning sun but mostly shade. I really don’t NEED this many of them; so I’ll probably give them away as gifts later in the season when they are fuller.
The ‘key’ to keeping your gardening expenses from spiraling too high is:
PATIENCE.
- Plant your own starts from seeds. (you can ever MAKE your own ‘plantable’ starter pots from empty toilet paper rolls!)
- Stick with PERENNIALS or bulbs that will grow back year after year. Plant once and DONE!
- If you MUST have ‘instant gratification’ and buy potted starts that will give you instant color; watch for sales.
- Save your receipts! Nearly all places that sell plants will offer some kind of guarantee. If your plant fails to thrive, you can get a replacement or refund; but ONLY if you have a receipt as proof.

Beautiful job improving your landscape and probably the whole street. Hopefully your neighbors will be inspired by your efforts. Maybe some of the gardening clubs or the Master Gardeners group in PDX area have sales like they do in Salem. Good work on the yard!
That was a lot of work and it sure looks nice!
I spread all that work out over the span of nearly a year. aj
It is going to be BEAUTIFUL! Thanks for including tips on how to handle those heavy bags. I need to dig out my luggage wheelie.
Good job! Really makes a difference when you landscape. Thanks for all the tips.
You have some great ideas! I like the ladder and trellises with trailing plants to provide shade. Looks like your garden is off to a good start. You’re right, it takes patience and a lot of hard work to envision what a garden can be.
This is what ingenuity and determination can accomplish. Congratulations (and 5 Gold Stars) on making your place beautiful!!!
Looks lovely. Here in Australia we have trouble with possums and native birds eating the seeds or chomping off pretty blooms. Grrrrr! I found a handy idea for knee pads. I used the old computer chair seat. I unscrewed the whole assembly and the arms actually stayed bolted on. So now I can get up using the arm rests and have my knees saved!
Fabulous idea on the knee pad with ARMS! Keeping my eye out for an old computer desk chair now! aj
Wow, that’s a lot of work you have done ! It looks and will look even better in the next few months. Hope you have a nice chair to sip lemonade (or a cocktail) in to relax and enjoy. 🙂
To keep squirrels out of your garden (rabbits too) sprinkle cayenne pepper on wet leaves. You may have to apply 2 to 3 days in a row, but the critters hate it and will leave your garden alone.
To keep birds out of seeds, simply buy screen wire, cut it in strips to fit your row of seeds, and use garden staples to attach it to the ground. You can pull it up, roll it up and store for following years use.
I love gardening, and I love your little piece of landscaping heaven!
Thanks for your input. I did quite a bit of research on-line regarding keeping squirrels from digging up my garden and I DID see the tip about cayenne . . . .BUT it also said it only works UNTIL it rains or is washed away by watering.
I can’t quite picture how the ‘wire method’ of keeping birds from getting to the seeds would work??? Unless it is a super fine grid, the birds could just peck right through the holes, couldn’t they? And a bigger grid would be even less effective. Also, I’m not due how you would pull it up after your seeds sprout; without pulling up your sprouts in the process??
It’s really just a temporary problem, once the plants get big enough they’ll hold up to a bit of digging (I literally check on them every day, and replant the ones that have been dug up) I’m HOPING to have those entire areas FILLED with plants and flowers . . . no ROOM for squirrels to dig up!!
It also doesn’t help that several neighbors down the street have squirrel and bird feeders to attract the critters! sigh.
Thank-you! Great info. I love gardening (when I have time) But this post has encouraged me to get with it and make time to do something I really enjoy. Your landscaping looks beautiful and will only get better with time. Again…thank-you!