Paper Feathers 2.0

Remember when I made these paper feathers last year?  And showed you HOW I made them.

p1350156

They sold really well in my booth at Stars, so I decided to make more.  But I noticed that the last few leftovers got very ‘crunchy’ over time and cracked and broke easily when handled.   Time to re-think the process to make them hold up better and longer.

Pretty much the same supplies: bamboo skewers, old sheet music and book pages and glue.  I decided to use regular Elmer’s glue instead of thinned down tacky glue this time.


P1380283

First I glued the bamboo skewer down the center of a scrap piece of book page.  Left them to dry overnight.   I did a couple dozen at a time.

P1380203

I used scrap cardboard, the fronts and backs of old cereal boxes, cut into thirds; glued the skewer/paper to the center of one side of the cardboard.  Let dry.

Then I glued a piece of pre-cut sheet music or book page paper to both sides of the cardboard.  This project uses a LOT of glue.  The average size on my feathers is 7″ x 3″, and I went through a 4oz bottle of glue for each dozen feathers.

P1380284

I used the handles of my scissors, but you could use a boning tool or any other ‘hard edge’.  After I placed my paper atop the skewer side of my cardboard, I ran the handles of my scissors along the skewer, to work out any air bubbles.

P1380287

Once I had several of them this far, I IRONED them.  Yep. I ironed them.  This helped set the glue and work out any air bubbles and to keep the cardboard nice and flat.  The glue wasn’t 100% dry at this point, so I let them sit overnight before cutting them.

P1380205

Then I cut them into a feather shape, then I cut the feather slits.

I came across one small kerfuffle in the process.  When I cut the slits in some of them, the paper was coming loose from the cardboard.  This happened after I had had no problem with about 40 of them, so I was perplexed!
P1380207

I just tossed out the one that came apart.  A few minutes later, it happened again?!?  What’s the deal with THIS batch??  I just tossed that one out too.  Then it happened to the very next one.  What the heck am I doing wrong??  Is this whole batch going to fall apart???

I decided to investigate a little further and pulled the paper completely off the ones that were coming apart and discovered that they were all from the same box!  So I ended up having six of them in total come apart like this.  Not really sure what was so different about that particular cereal box that caused this to happen; but I can tell you that it was the one and only ‘store brand’ cereal box that I had in my stash.  So, FWIW, keep that in mind if you decide to make these.  P1380220

I’ve already taken a big batch of them to Stars, and made a second batch for the upcoming Spring show.

Time for another SALE @ STARS!!

Just what you need to fend off those winter blahs!!  Shopping therapy!

STARS 5-day sale

Thursday, February 28th – Monday, March 4th

11am – 6pm ~  Both stores.

I just took in TEN BOXES of fresh product this week to ready my booths for the sales.

P1380278

I brought in my beach cottage decor.

 Mermaid crowns, shell topped bottles, beachy lanterns and candles.

How fabulous is this shabby white wood trough?!?  I’ve used it to display some beach decor in, (floating starfish frames, white glittered sugar starfish and some metal bowl fillers) but you could use it for dozens of other things.  Perfect piece for the center of your farmhouse table.

I made these sweet little beach lamps.  Found the lamps at an estate sale, and filled the clear glass bases with an assortment of shells and beach glass.

These one of a kind lamps are $49.00 each.  OR $49.00 for BOTH during the sale!

The shabby beachy crates UNDER the table are for sale too!

These fishbowl beachscapes are so much fun to make.

These little ‘six section crates’ make handy little display shelves for smaller items.

Small sea glass wreaths, framed pictures and framed shells.  Beverage bottles and shell topped bottles.

Beachy wreaths and framed shells are hung on the side of my other booth.

***Helpful hint:  If you have some starfish or shells that you want to mount and frame, use a piece of sandpaper for the backing. 

Vintage ironstone creamers, sugar bowls, soup/cereal bowls and butter bells.  Vintage glass snack sets and apple shaped snack plates.

Lots more Ironstone dishes and cake stands.

I’ve added lots of newly procured vintage milk glass pieces too.

Two little pink chairs and a little pink scalloped edge shelf, perfect for a little girl’s room.  Upcycled male and female mannequins are great decor pieces.

Regular price on the male is $129.00 ($64.50 at half off during the sale)  Female mannequin is $155.00 ( $77.50 at half off during the five-day sale only)

P1380275

My wall booth is stocked plentifully for the sale too!

Pretty white frames, gold glitter metal crown, big vintage jar filled with dried Hydrangea (from my very own garden!) sweet little crystal accent lamp.

Another little accent lamp, this one is an upcycled vintage Ball Mason jar, next to an upcycled vanity mirror tray.   Unique shape, narrow bird cage.  Gold cherub jewelry box and gold metal cake stand.

Little brown glass jars and itty bitty glass vials with plastic lids.  I’m really not sure what people use these little jars and vials for, but they always seem to sell well.

Vintage lamp tables.

Heavy duty set of wicker nesting tables with cast iron legs.  Priced individually at $29.00, $39.00 and $49.00; because if I priced them as a set ‘someone’ will want to buy just one of them.  Pricing them individually just makes it easier.  Of course you can buy the entire set still; you just don’t HAVE to.

50% OFF SALE PRICE FOR THE SET OF 3 IS $58.50.

There are three graduated sizes of these metal tables too, but they don’t ‘nest’.  They will ‘stack inside each other’ for transporting, but they have to be displayed individually.  (It’s kind of difficult to explain without being able to show you!)  They make nice little plant of lamp stands and are light weight enough to hang on the wall.

It’s difficult to see the second one in the picture on the left.  It’s just below the other one, and I used the third one under one of the beach lamps.

A new batch of hand crafted paper feathers, made from vintage book pages and sheet music.  I made this batch of the differently than I did the first ones.  Tutorial to follow soon.  Upcycled gold metal cloche on upcycled metal dessert stand.  Vintage cherub statues.

Get out and get yourself some BARGAIN SHOPPING THERAPY at Stars!

Half off all Christmas!

Christmas is less than a week away!  WhaaaaaaaaaaaaaaaaaaaaaaaaaaaaaaaaTTT?!?!  How is it that even though Thanksgiving was early this year, basically giving us an extra WEEK between then and Christmas; that Christmas has still snuck up on me?!?!  I have not even started wrapping gift yet!  sigh.  And to further ZAP my Christmas spirit, I have to go to Costco tomorrow . . .  because I use their pharmacy for my prescriptions.  Ug!

P1370821So to give my Christmas spirit a little boost and add a bit more “JOY” to my life; I’ve decided to put all my remailing Christmas product on sale for HALF PRICE, in my booth at Stars.

P1370792

Many other vendors are offering discounts on their Christmas product too.  Instead of settling for the ‘slim pickins’ left over in the big box stores, come shop at Stars for unique vintage and upcycled gifts that they will really LOVE!

P1370861

~::~

Still a great selection of gifts, decor and gift boxes in both of my spaces.

Show off your favorite Christmas treasures by topping them with a glass cloche.

Unique and collectible gift boxes.

I found some ‘itty bitty glass baubles’; just the right size for decorating your bottle brush trees!

Cubbies filled with collectibles!

Hand crafted vintage sheet music and crepe paper rosette ornaments or package toppers; regular price $1.50 – $2.00 . . .  NOW HALF OFF!

MERRY CHRISTMAS

to you all!!

STARS HOLIDAY HOURS:
Christmas Eve: 11AM to 4PM
Christmas Day: CLOSED
New Year’s Eve: 11AM to 6PM
New Year’s Day: OPEN! 11AM to 6PM
11AM to 6PM ALL OTHER DAYS!

MORE Christmas in my booth at Stars

Took the rest of my Christmas goods to Stars this week.

P1370612Both of my spaces are fuller than full!

P1370610

Plenty of vintage white Ironstone dishes in my wall space.

 Unique hand crafted gift boxes, perfect for that ‘little gift’ or gift cards.

Hand painted Christmas signs, red glass jar lanterns come with a battery votive and SO CUTE little vintage style car with tree on top ornaments.

Trees.  Trees and MORE trees!  Bottle brush trees in just about every size and color; mounted on unique vintage bases: candle holders, tart tins, glass vials filled with ‘snow’, spools of thread and cherub candle holders!

‘Snowfolk’ made from vintage salt and pepper shakers are making an encore appearance this year; but it will be their final year.  Get them while you can.  Bottle brush trees and snowmen are the perfect winter decorations to leave out after Christmas and before you decorate for Valentine’s Day.

Vintage crepe paper rosette ornaments also make wonderful package toppers.

Vintage sheet music rosette ornaments with classic Christmas color adornments of red, gold and silver.

Both Stars malls are open 7 days a week; 11am – 6pm.

Give unique vintage and upcycled gifts this Christmas.

“Happily Ever After” ~ New wall space display.

Sorry that it has taken me so long to get the new booth display posted.  Been dealing with a LOT of things all at once.  Finally feeling settled enough to get caught up on my blog.

P1350793

The theme for May is “Happily Ever After”.  Wedding decor.  Mostly whites with touches of gold, silver, pale pink and blue.  LOTS of vintage milk glass.

Here are some of the major elements that might be a little hard to see once they are filled with displayed smalls.  Lots of shabby white tables and shelves.

Some of the hand crafted elements.  ‘Happily Ever After’ banners made using vintage sheet music and book pages.  Bride to be crowns.  Vintage paper feathers.  Hand stitched vintage lace and felt hearts.

Vintage shabby white candelabras and metal filigree lanterns.

Most of the small shelves can be wall hung OR set on a flat surface.

I couldn’t fit ALL the milk glass and cake stands in the wall booth.  Lots more to explore in my bigger booth.

As always, aqua and turquoise.  Vintage chenille spread and coverlet.  Little aqua stuffed hearts made from vintage chenille cutter spread.  Trugs with vintage wood legs as handles, and pretty dessert stands.

P1350811

Front view of my big booth.

P1350829

As much of what was leftover from last months booth display as I could fit, has been moved over to my bit booth.  Bird nests, jars of eggs and moss, jars of natural elements, bark, moss, dried flowers and pods.  Some of the burlap items.

And lots of the assorted galvanized stuff.  Including that cute 12 hole cubby shelf!!

P1350792

A NEW Vintage book page craft! PAPER FEATHER TUTORIAL

Well, it’s new to ME.  I’ve been seeing the paper feathers made from vintage sheet music and book pages on Pinterest for a while now.  Initially they didn’t really appeal to me; but I decided to try my hand at a few to see how difficult they were to make . . . .  and BAM!!  I’m hooked!  I love them and I really enjoy making them.

P1350148My biggest issue with all the ones I was seeing on Pinterest was coming up with something sturdier than just wire for the stems.  Bamboo skewers worked perfectly.  I made the smaller size feathers using the regular size skewers, and some bigger square-shaped ones (closer to chop-stick diameter) for the bigger ones that I made.

I used several different kinds and colors of book pages.  The yellowed sheet music shown above and some varying shades of white dictionary and book pages.

SUPPLY LIST:

Paper: old book pages, sheet music, dictionary pages or ANY other paper

Bamboo skewers for the stems

Thinned down tacky glue: for gluing the two layers of paper to the stem.  Add just enough water to your tacky glue that it’s easily brushed on with a paint brush.

Scissors for cutting out the leaf shapes and feathering.

Mod Podge: apply one coat to each side of your feather shape BEFORE cutting your slits.

As with just about any crafting I do, I prefer to work in an assembly line style.  I selected the vintage papers that I wanted to work with and readied the rest of my supplies.

  1. Fold paper in half so you get two matching pieces of each leaf shape that you cut.
  2. With your thinned tacky glue, evenly coat one side of a leaf and put glue down the center only of the matching leaf.
  3. Place your skewer in the center of the fully glued leaf, and lay the other leaf on top.  Gently press along the skewer with your fingers to get the glue to grab it; and smooth the edges to be sure they are completely glued together.
  4. Set aside for several hours for the glue to completely dry and cure.  (overnight is best)  Your paper will curl a bit from the moisture in the glue, but you WANT that to happen.  It gives them a more natural feel.

P1350146

5. Vintage paper can be very brittle.  I ruined several of mine just handling them and gluing them together.  To strengthen your final product, apply a coat of matte finish Mod Podge to each side; one side at a time.

P1350147

Mod podge dries pretty fast, adds a little more ‘character curls’ to your paper and will help your feathers last a lot longer.  The mod podge gives the paper a bit of a plastic coated feel.  If you aren’t sure if you will like the look and feel of the added Mod Podge, just do ONE feather with it as a test, and one without it; to see which you like best.  A little bit of the Mod Podge is going to seep over to the other side of the feather, so be sure you lay them to dry on something ‘raised’.  Across an open box or on a cookie cooling rack.

6.  Gather up your dried feathers and grab your scissors.

P1350160

Go through your entire batch of them making your first ‘V’ cuts; 3-5 cuts per side, depending upon the size of the feather.  I always keep the total number of cuts as odd number.  IE 3 on one side and 4 on the other.  These cuts are going to be the GUIDES for your smaller cuts, so be sure you make the cuts in the direction that you are going to want ALL your cuts to go.

P1350159

7. After you have made those cuts in your entire batch, go back and do the feathering cuts on all of them.  Make your cuts as close together as you can, and cut as close to the stem as you can.

Here are the different kinds of paper/ shapes and sizes that I made.

As you may have guessed from the above pictures, they can become quite addicting to make!!

NOW, I just have to figure out how to use them and display them to sell in my booth at Stars!  Suggestions are welcome!

Mixed Media Bird collages

I found these two wood Easter plaques at Goodwill, but they had come from Target’s Dollar spot.

I like the using ‘box type’ design for making collages.  The sides of these were already colors and designs that I liked and could work with!

I had some pretty new paper napkins with bird eggs on them that I was itchin’ to play with, so I decided on a bird theme for these two plaques.

P1270460

A few layers of book pages, then the napkin, then a couple more book pages cut into ‘fancy shapes’, then a rectangle from a Chinese magazine and a bird illustration from a bird book.  A quote from a book and of COURSE, a crown!

P1270463

What do you think of my new photo backdrop?

With all the warm and dry weather we’ve been having I got a few ‘personal’ painting projects done.  One of which was this shelf and the table it sits on.  This ‘shelf’ is actually 1/2 of an old coffee table that was once a display shelf in my booth at Stars.

These are the pictures from ‘back when’ I used them as display shelves in my booth.   I’m now using the half coffee table as  a shelf atop halr of a dining table that is in my ‘office’ (which should be the dining room!)

P1270458

The lamp has always been in this spot.  I bought it to go with this collection of similarly shaped bottles; which used to be on a shelf in my living room.  I had hoped to figure out a way to display them all together in the living room; but I just couldn’t make it work.  So I settled for this set up; which I like just fine.

And the second collage; styled fairly similarly to the first one.

I extended the napkins over the edges, and they are sheer enough that the original side color and design show through.

P1270470

This is really my FAVORITE part of them!  hehe

P1270469

Since the pieces were rectangular in shape, I oriented them in different directions.

They are available for purchase in my booth at Stars.

P1270499

New ‘fauxzen Charlotte’ project

I’ve been trying to think of a new way to use my faux Frozen (fauxzen) Charlotte’s.  So, I decided to look back in my blog to see what all I had done with them in the past.  I honestly FORGET about some of the projects I’ve done, until I SEE them again!

Wow!!  A lot more than I thought I had done!  I’m not sure there IS anything NEW left to do with them!?!

P1260811And then I come across some square shaped brown glass jars that are the perfect size for a mini Charlotte collage!

It was a pretty quick and simple project.  Vintage book pages background and wings; die cut crowns from metallic paper.  I tied some tea stained cheesecloth on the top and added some cute little charms.  Bam!

Prettied up trinket boxes

Cute little trinket box with magnetic closure makes for a quick and easy make-over.  (found the box at dollar store!)

I cut a piece of paper big enough to cover the existing image; but left the pretty border still visible.

P1260099

Then I glued a stamped piece of muslin on top of that; just a little off-center.

P1260102

I added a little scrap of matching paper to the underside of the lid.

P1260093

The sticky label on the bottom of this one just so happened to peel off perfectly; which is NOT usually the case.  IF it had not come off without damaging the bottom of the box, I would have glued another piece of paper to the bottom as well.

Just so happened to find another box at a different store, with the exact same design.  Went with a simpler design on this one.  Covered the whole top and front with vintage dictionary page; added a vintage post card image and a ‘paper’ key.

This one is a soap box that I saved.

This one had a very pretty design on the existing paper, so I just needed to partly cover it.  A piece of paper and a crown stamped on muslin, off-center.

A little piece of matching paper to cover the ‘non-removable’ label on the bottom of the box.

And a little piece on the underside of the lid ‘just for fun’ (this piece wasn’t really ‘necessary’ because it’s not covering anything  . . . I just thought it added a little interest!)

Mini mixed media easel collages

I did the ‘backgrounds’ on these a while ago, along with several others.  Set them aside for a while until I decided what MORE to do with them.

Assorted scrap papers, book pages, sheet music and pattern tissue papers.  No real ‘method’; just layer upon layer upon layer until it ‘feels’ right.

This is what the easels looked like when I bought them at Dollar Tree several years ago.

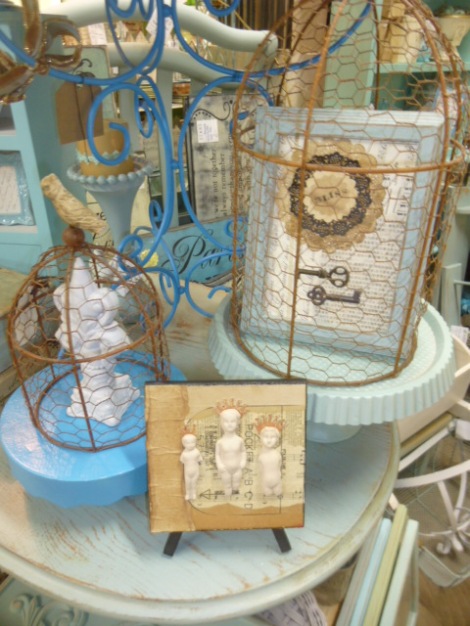
I decided they would make cute backgrounds for the Fimo fauxzen Charlotte’s that I make.  It’s really handy having the attached easel.

This first one I added just a ‘bust’; with kraft cardboard wings and cut one of my mini sheet music crowns in half to glue the flat side to the backing.

Some Monarch butterfly wings and a paper crown on this one.

Monarch butterfly wings #2; the other half of the previous sheet music crown and letters cut from a book.

P1260901

I’ve only taken this one to Stars; saving the rest for ?????